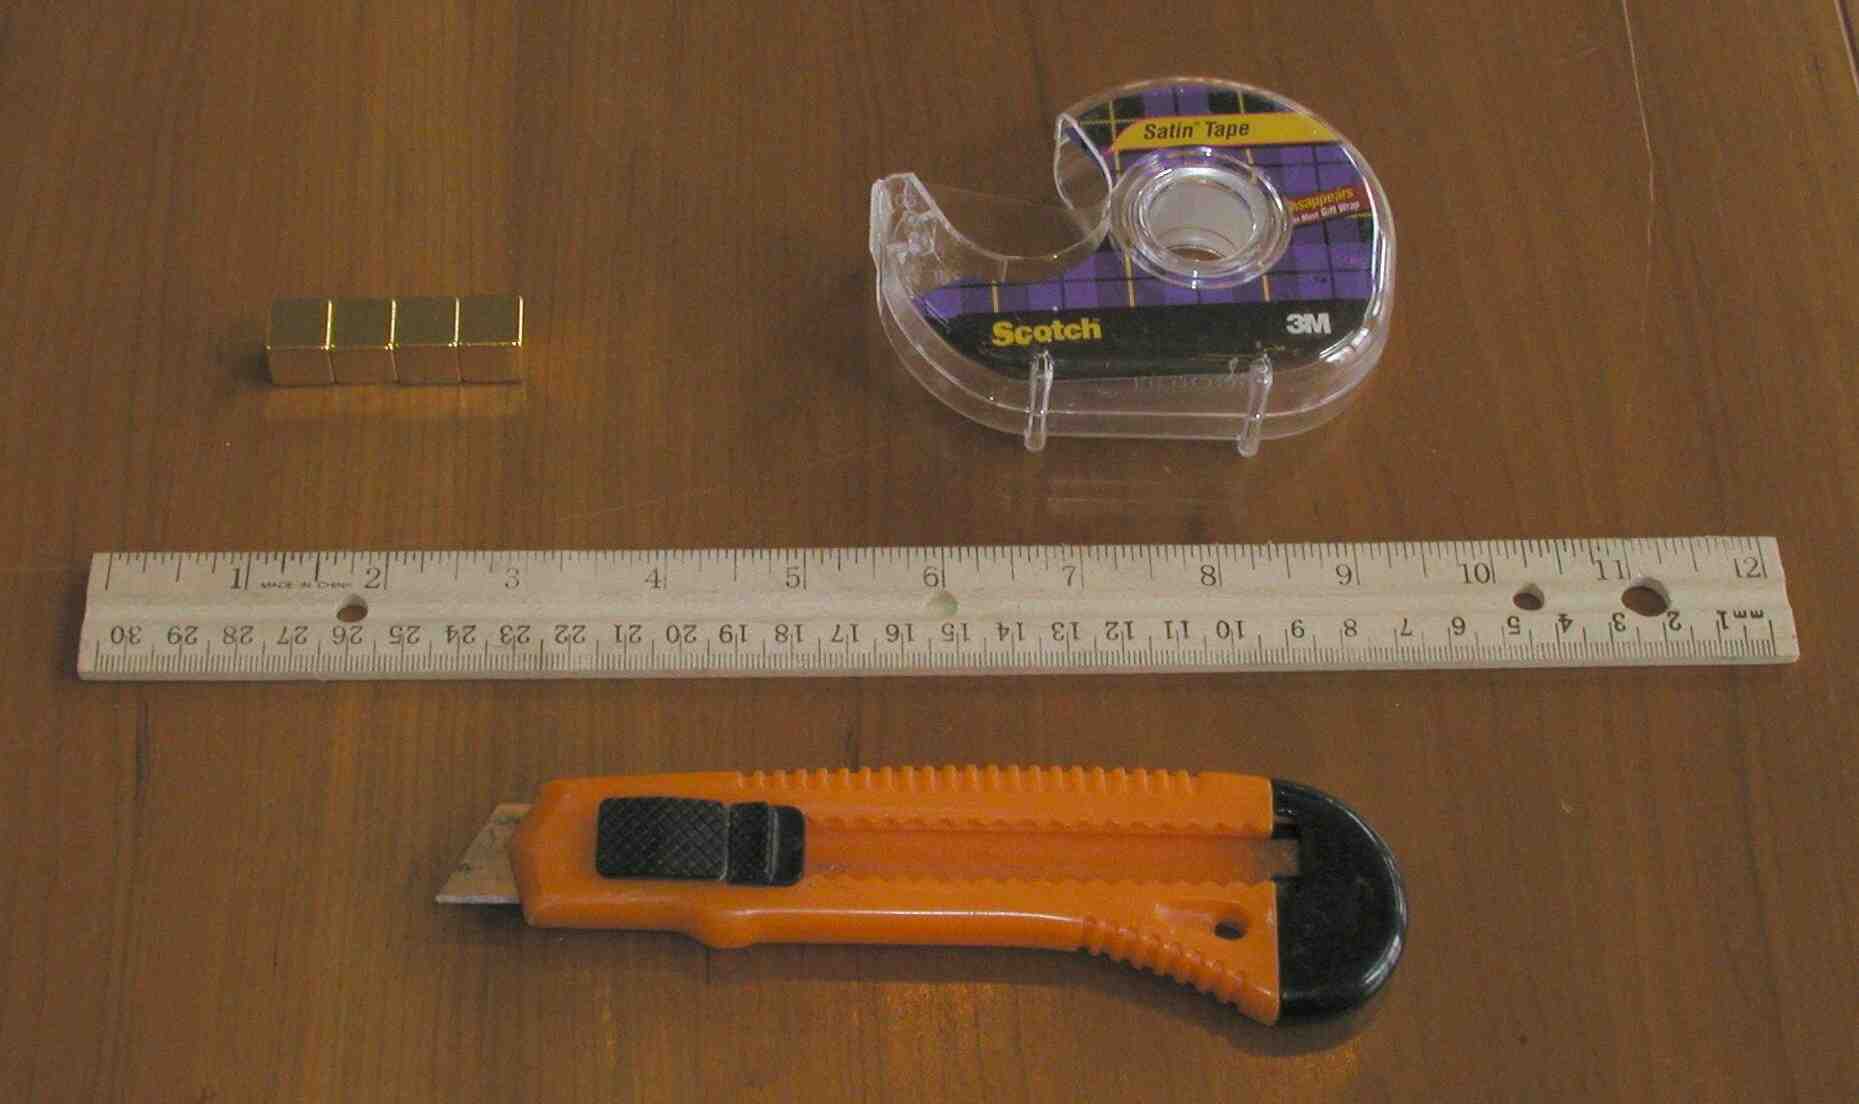
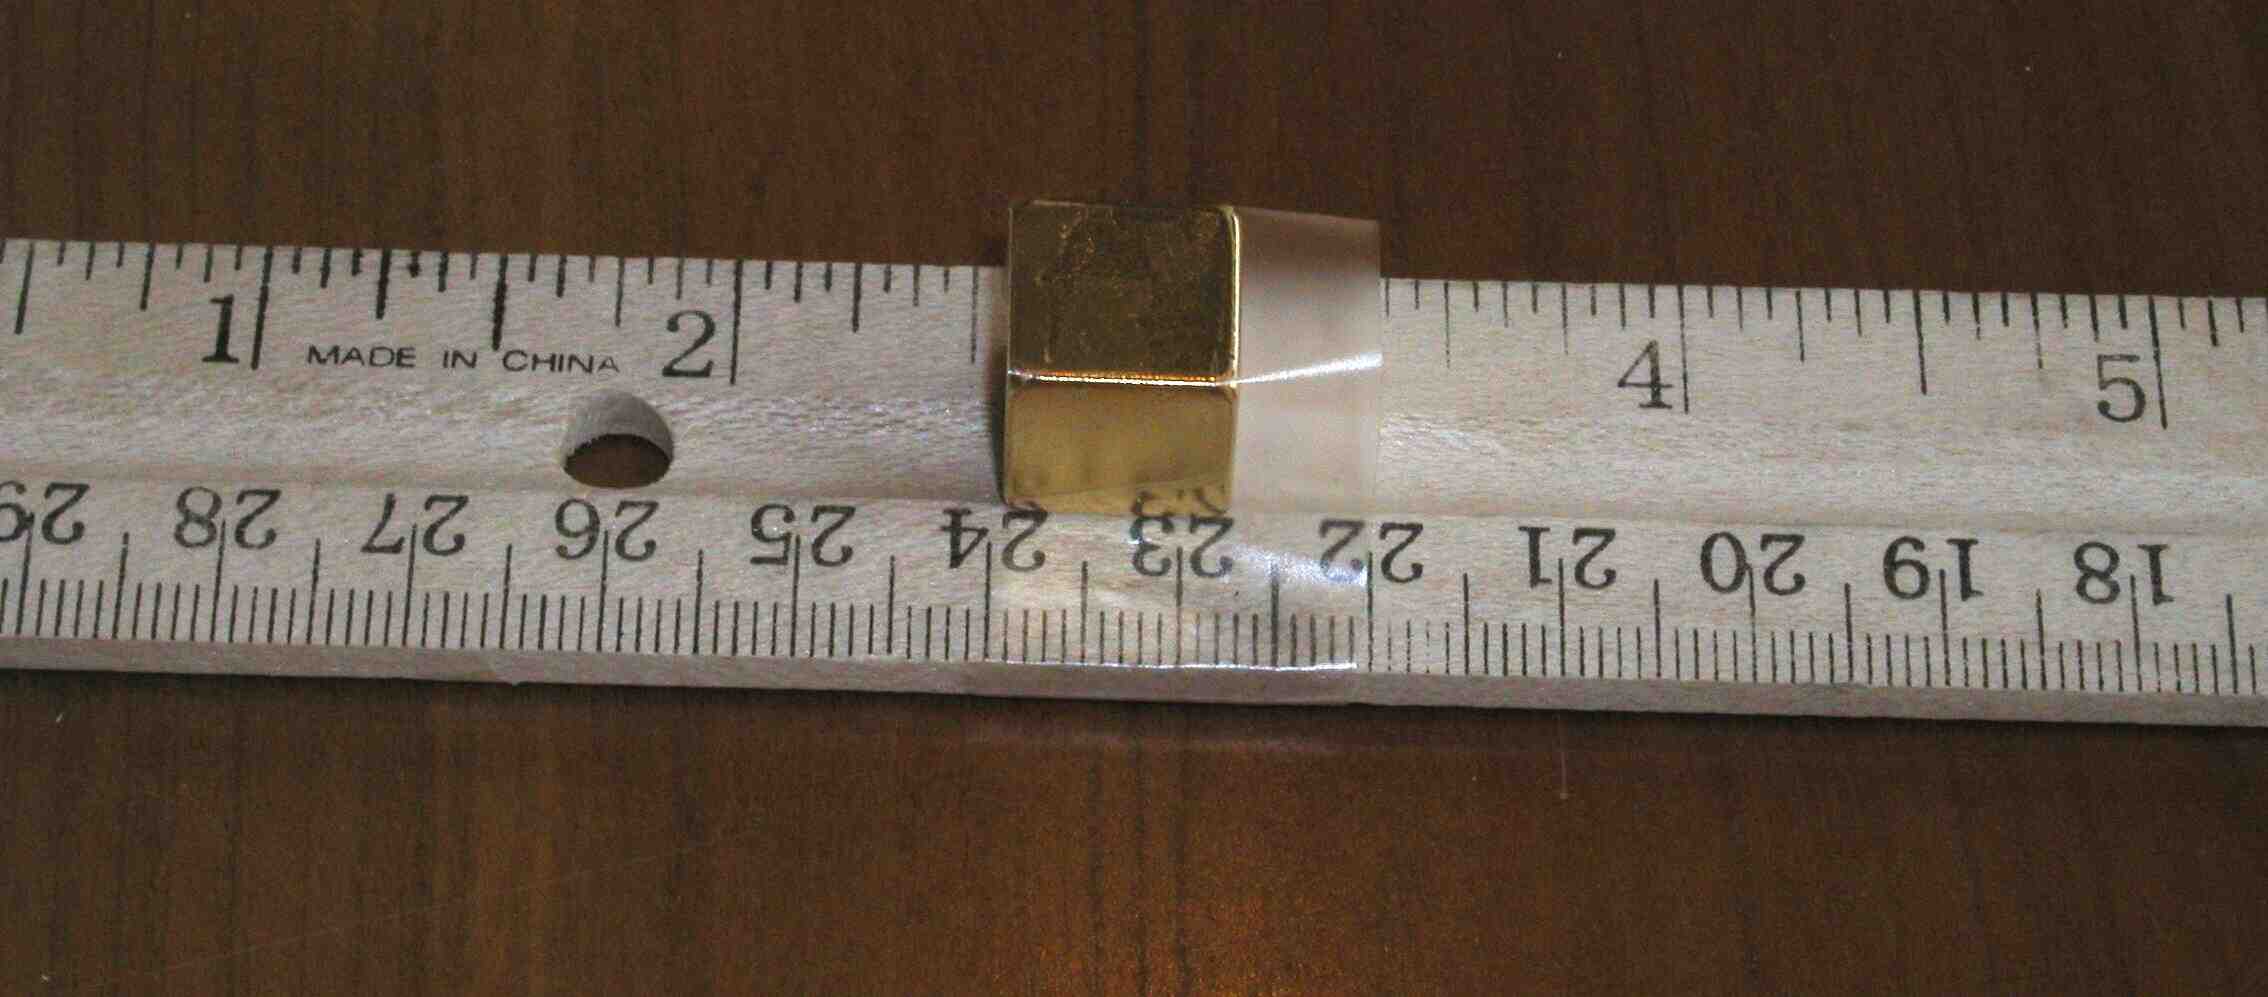
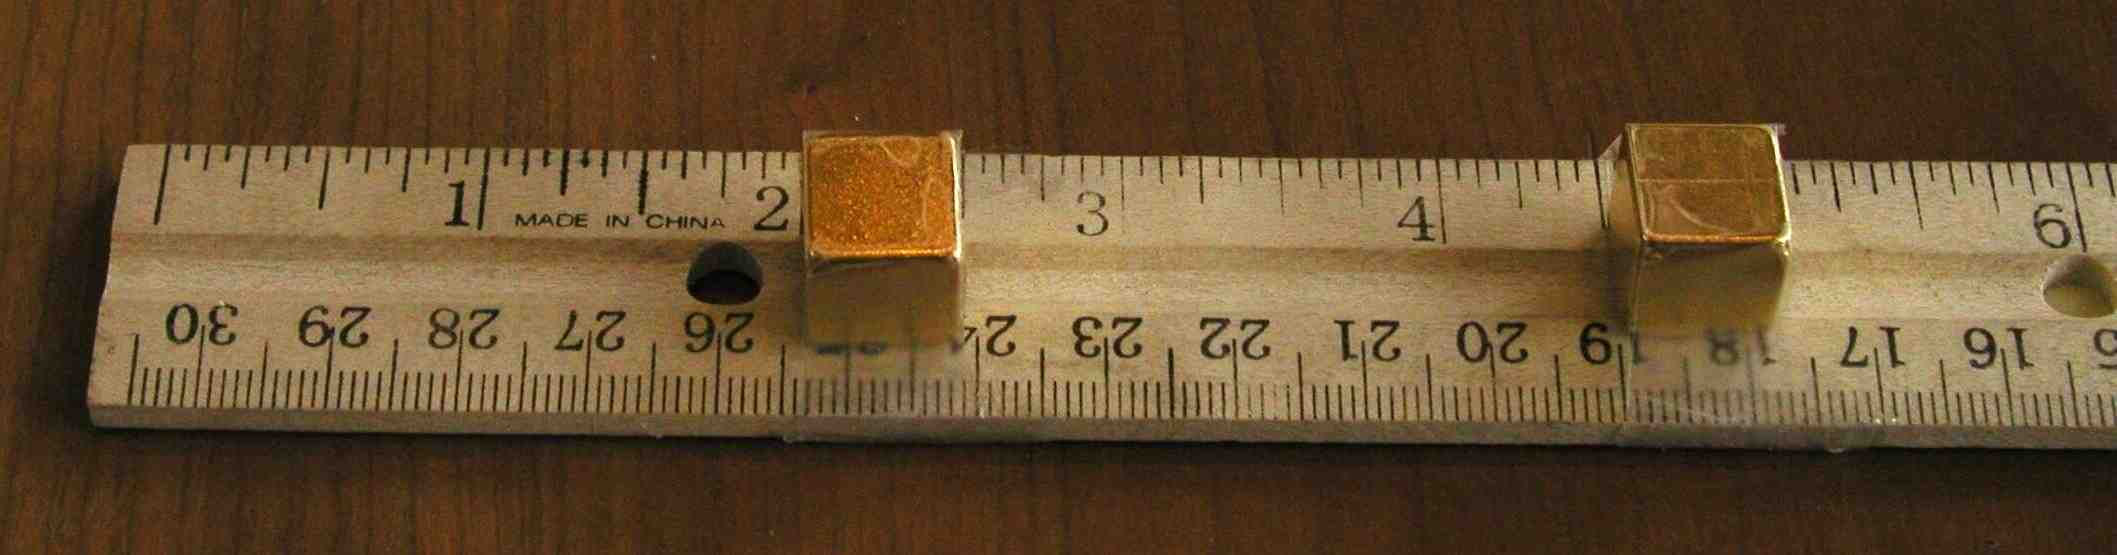
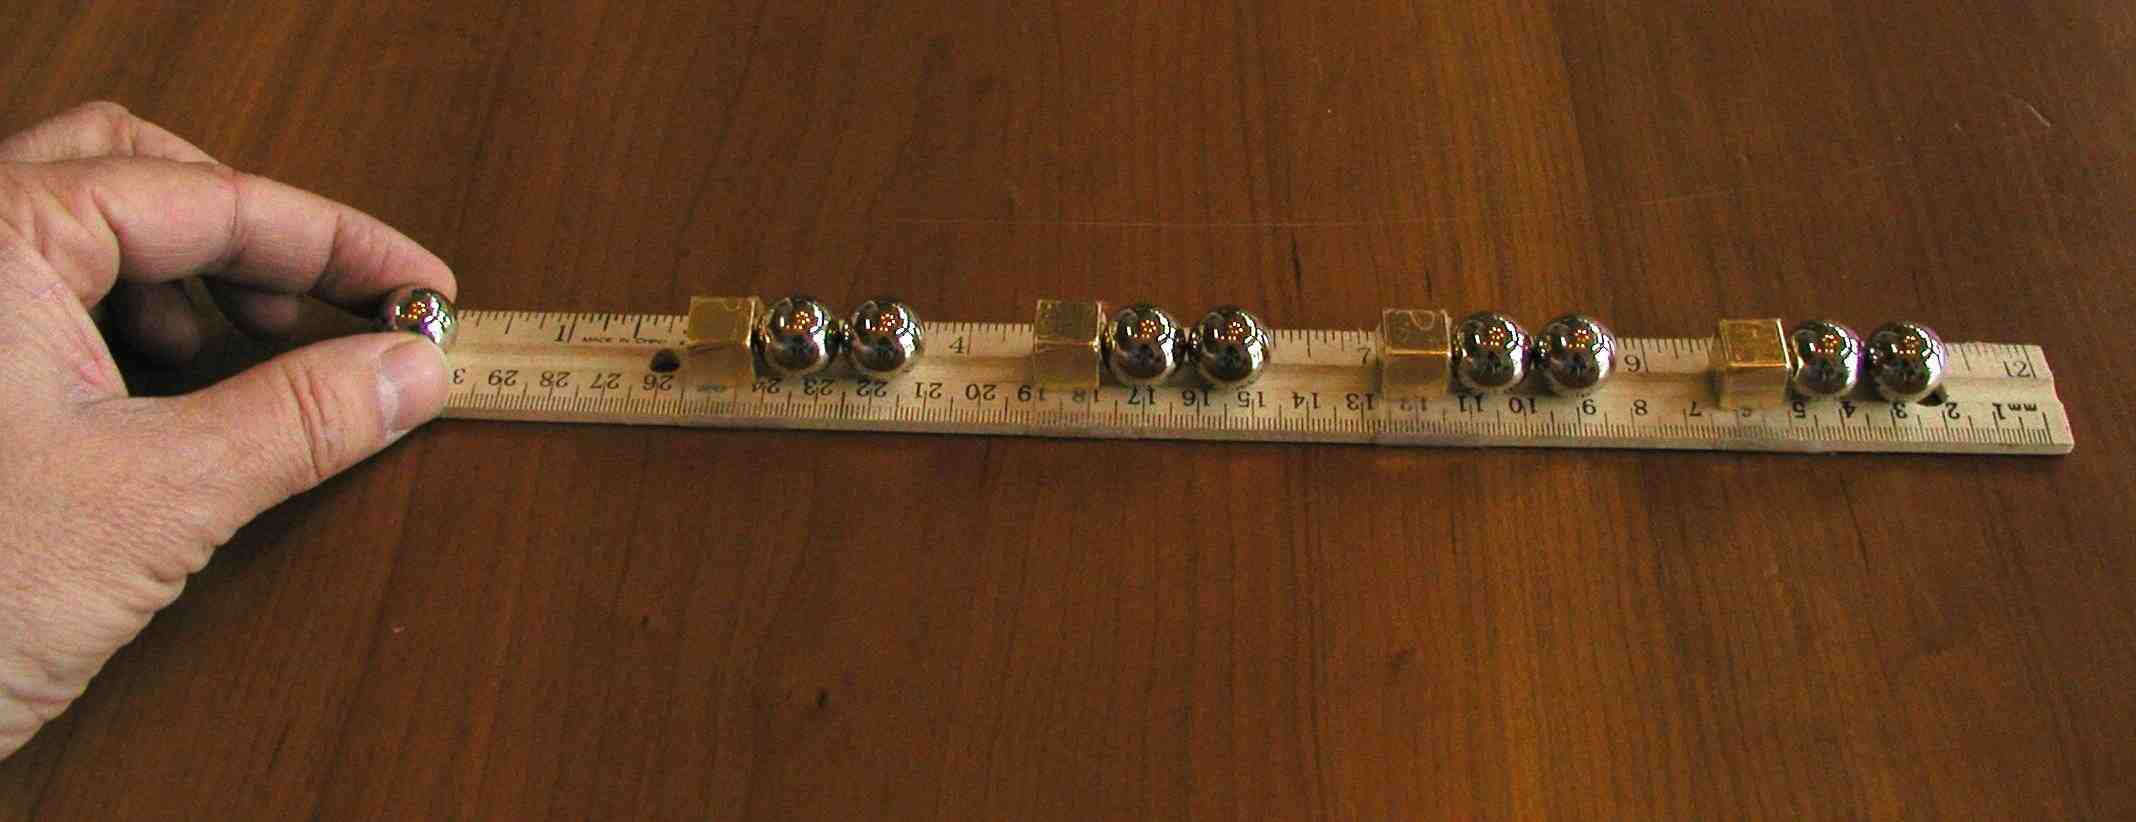
How To Build A Gauss Rifle


Permanent Link This or Add to del.icio.us or
reddit or Spurl
or ma.gnolia or
newsvine or
even Digg us.
3 comments
![]()
![]()
How to make digital circuits, analog circuits, PLLs and lots of other fun things that electronics hobbyists love to make.
Design Your Own Graphic Equalizer
Understanding Noise In Circuits

PLEASE follow the directions. I am not responsible if you screw this up and Baal or some other demon sucks you into the pits of Hell
You First need to build the circuit below and connect it to Line-in of Sound Card:
Then use this software to see the wave forms


Permanent Link This or Add to del.icio.us or
reddit or Spurl
or ma.gnolia or
newsvine or
even Digg us.
3 comments
![]()
![]()
| Making strobe lights hip again without actually going back in time: Instructions for making your own nifty device can be found here. |
Permanent Link This or Add to del.icio.us or
reddit or Spurl
or ma.gnolia or
newsvine or
even Digg us.
0 comments
![]()
![]()
 The 555 clock makes 4029 counter count. But the clock can be clamped to gnd by a TL062 window comparator. The clock is frozen when the input value to comparator pin 5-2 is within a lower limit and upper limit "window" pin 3-6. The 4029 counter BCD is decoded to decimal by 4028 which drives the LEDs, keep LED drive within 3mA or chip will be loaded. Use high efficiency extra-bright LEDs. The 4029 BCD also controls a shunt resistor array with CMOS switches 4051. The voltage across shunt is a sample of leakage current. This is compared in the window comparator to freeze the Clock and LED display to give a reading of the leakage current or Insulation Resistance. |
Permanent Link This or Add to del.icio.us or
reddit or Spurl
or ma.gnolia or
newsvine or
even Digg us.
0 comments
![]()
![]()
 This is a DC controlled Solid State Relay which can turn 230V AC equipment on and off. The output is like a NO normally open contacts of a relay and have to be in series with the Load like any other switch. This should not be used for large inductive loads like big motors. The Q1 transistor limits the current thru the LED by providing an alternate path for more current. The DC input can be from 3V to 20V. The Triac can be chosen depending on current in the load. Look for datasheets and applications at ST Microelectronics for BTA41600 triacs. Motorola Semiconductors for MOC3041 zero crossover opto-diacs. |
Permanent Link This or Add to del.icio.us or
reddit or Spurl
or ma.gnolia or
newsvine or
even Digg us.
0 comments
![]()
![]()
Dual Power Supply List Of Components For Power Supply. 1. Transformers X1-6-0-6 (500 ma), X2-12-0-12 (500ma) 2. Semiconductors IC6-7805, IC7-7808, IC8-7908, D1 to D10-IN4007, D11 and D12 - 12v, 1W, Zener 3. Resistors. R1 and R2 - 100E 1/2 W CFR 4. Capacitors. C 40v C5 and C8 - 1000 Mfd , C1 - 2200 Mfd, C5 and C7 - 0.1 Mfd, C9 to C12 - 100Mfd 5. Miscellaneous F1-250ma, N1-Neon, 3-Pin Mains Chord. POWER SUPPLIES: Every electronic gadget primarily needs a D.C. power supply to energize it. It also forms the basic requirement for any constructional project. consequently there is a need to obtain multiple voltage values for cost reduction, convenience and compact arrangement for all the above applications. The required D.C. power supply is usually obtained by means of a transformer. It is also possible to have transformer-less power supplies. Though the elimination of the transformer makes the circuit compact, economical and simple, also facilitating quick assembly and built in short circuit protection, certain drawbacks creep in. These power supplies are useful only for low current applications. Special safety precautions are to be followed while using them. Physical contact should be strictly avoided, since the output terminals are not isolated from A.C. mains supply. This obviously necessitates the use of a transformer. By suitable modification it is possible to obtain multiple/ fractional dual voltages from a transformer. Different not-so obvious voltage values can also be obtained from the transformer by rectification circuits. The output so obtained from a transformer secondary is unregulated. For good load regulation, the internal impedance of any power supply should be as low as possible. The regulation can be improved either by resistor zener method or series regulator method. However, the three-terminal regulators greatly simplify the power regulation problem. These regulators need no external components. They employ internal current limiting and thermal shutdown which make them tough. For simplicity, compactness, convenience and accuracy the use of threeterminal regulators is ideal. These IC voltage regulators are freely available in various ranges both positive and negative. A functional schematic of a three terminal regulator is shown in the datasheet. It can be seen that the device is a complete regulator, with built-in reference, error amplifier, series pass transistor and protection circuits. The protection circuits include current limiting, safe area protection to limit dissipation in the series pass transistor and thermal shut down to limit temperature. Low power IC voltage regulators of the 78L series used in our measuring instrument are now so cheap that they represent an economic alternative to simple zener-npn stabilisers. In addition they offer the advantages of better regulation, current limiting/short circuit protection at 1000 mA and thermal shunt down in the event of excessive power dissipation. In fact, virtually the only way in which these regulators can be damaged is by incorrect polarity or by an excessive input voltage. Regulators in the 78L series upto the 8v type will withstand input voltages upto about 35v, whilst the 24v type will withstand 40v. Normally, of course, the regulators would not be operated with such a large input-output differential as this would lead to excess power dissipation. All the regulators in the 78L series will deliver a maximum current of 1000mA provided the input-output voltage differential does not exceed 7v. Otherwise excessive power dissipation will result, causing thermal shutdown. Two transformers have been used to step down the voltage from 230-250v a.c. mains input. One of the transformers produces an output of 6-0-6v at the secondary terminals. This output is fed to a full wave rectifier and a capacitive filter. The filtered output is fed to IC6 which is a 3 pin voltage regulator which gives a regulated output of + 5v. This is used to activate the DPM circuit. It is also fed to the temperature network as a precision voltage reference source. The other transformer produces an output of 12-0-12v at its secondary terminals. The centre tap is grounded like in the previous case. The other two terminals of the secondary are fed to a bridge rectifier constructed using diodes. The rectified output is filtered by using capacitor C5 and C6 fed to IC7 and IC. The IC7-8 which is are 3 pin voltage regulators gives an output of ±8v. These two voltages are fed to the signal generator. The -8v source output is fed to the temperature network, also as voltage reference. It is also necessary to produce a +12v and -12v supply for application to operational amplifiers. This can be conveniently done by means of 12v zener diodes. The output of the bridge rectifier is clamped to +12v and -12v respectively using two zener diodes. The zener output is fed to the operational amplifier supply terminals. Since the supply to the operational amplifiers need not be very efficiently regulated to + 12v, the use of zener diodes proves economical. For the testing of electronic components a voltage of above 50 V is required. This can be achieved by means of a voltage quadrupler circuit. It consists of four diodes and four electrolytic capacitors. The secondary ungrounded terminal of the 12-0-12v is connected to the quadrupler circuit. The output of the quadrupler circuit is 68v with respect to ground. The two transformers can be controlled by the power supply switch PS 1 The switch also controls a neon lamp, which lights up once the transformer supply is on. The instrument is prevented against short circuits-excessive voltages by fuses. When the a.c. power supply exceeds beyond 250 volts resulting in any overload or damage, the fuse F1 blows out thus saving the rest of the circuit within the instrument. The a.c. power is drawn from a 3 pin plug connected to a cable of 1000 mm to activate the instrument. The ground terminal in the 3 pin plug is earthed to the chassis, while the other two terminals are connected to the primaries of the two transformers. Errata- D7 one end should be grounded. |
Permanent Link This or Add to del.icio.us or
reddit or Spurl
or ma.gnolia or
newsvine or
even Digg us.
0 comments
![]()
![]()